Game UI in Unity · Lesson 01 · 20 min
Nine-slice a panel so it never smears
Put one real pixel-art panel into a Unity Canvas and set it up so it can be any width or height without its corners or bevel distorting.
Every dialogue box, health bar frame and menu backing in a pixel-art game is the same object: a small drawn panel that has to be shown at a size the artist never drew. Unity has one mechanism for this, and getting it right is the first thing that separates UI that looks like part of the game from UI that looks like a stretched screenshot. By the end you will have a Kenney panel in a Canvas that you can drag to any size with clean corners, and a rule for finding the numbers it needs.
Which UI system, in one paragraph
Unity ships two runtime UI systems. This course uses uGUI (Unity UI): a Canvas
GameObject with Rect Transforms and components such as Image and Button. Unity’s own
comparison of UI systems
for Unity 6 lists uGUI as the recommended system for runtime UI and UI Toolkit as the
alternative, and lists UI Toolkit as recommended only for Editor tooling. uGUI is also
the system that supports in-scene authoring, Animation clips and serialized events,
which are the three things a jam UI leans on. The com.unity.ugui package is already in
a Unity 6 project, so there is nothing to install.
What a plain stretch does
Here is Kenney’s blue outline panel, 48×48 pixels as drawn, shown at three times size so one drawn pixel is a 3×3 block. Next to it is the same file resized to 48×120 the way Unity’s Image component does it by default (Image Type Simple), and then the same size drawn with nine-slicing.
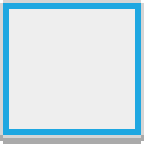 As drawn48×48
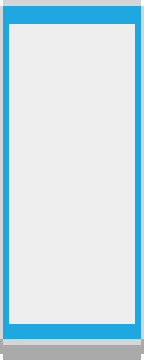 Simple48×120, stretched
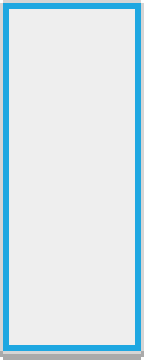 Sliced48×120, borders 3 3 3 5
build-examples.py. Stretching to 120 tall multiplies every row by 2.5, so the 3-pixel top edge becomes 7.5 pixels while the sides stay at 3. The frame stops being one weight.That is the entire failure. A frame drawn one weight comes out two weights, and the corner radius turns into an ellipse. It happens on every panel that is not a flat rectangle of colour, which is every panel worth drawing.
Nine slices
Unity’s fix is 9-slicing: “a 2D technique that allows you to resize a sprite without creating multiple sprites for all the different sizes.” Two horizontal cuts and two vertical cuts divide the sprite into nine pieces. In Sliced mode the corners keep their size, the top and bottom edges stretch only sideways, the left and right edges stretch only vertically, and the centre stretches both ways. Tiled mode uses the same cuts but repeats the edge and centre pieces instead of stretching them.
Where you put the cuts is the whole skill. Unity calls the distance from each side to its cut the border, and you type it as four numbers: L, R, T, B.
A panel slices cleanly only where its rows and columns repeat. Stretching a band of identical columns sideways invents nothing, so nothing can smear. The border on each side is the number of rows or columns that sit outside the band of pixel-identical rows and columns through the centre. That is a measurement, not a guess.
Measure the border
assets/build-examples.py applies that rule to all 30 nine-slice panels in Kenney’s
pack. For the plain grey panel:
| Side | Border (px) | What is in it |
|---|---|---|
| L | 3 | outer line, bevel, inner highlight |
| R | 3 | the same |
| T | 3 | the same |
| B | 5 | the same, plus a two-pixel drop shadow |
The bottom is different. If you type 3 on every side because the panel looks symmetric, the shadow lands in the stretch band and gets pulled across the whole width. Across the pack only 9 of the 30 panels have the same border on all four sides, so “one number, four times” is wrong more often than it is right.
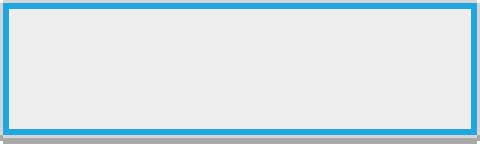 Borders 3 3 3 5160×48
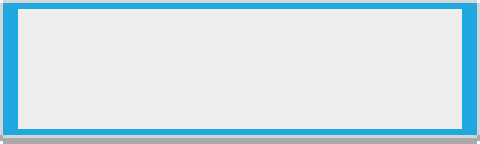 Borders 2 2 2 2160×48, bottom corners break
Slice lab
Guess first, then check. For each panel, make it wide and tall, switch to Sliced, and type the four borders until the verdict says the corners are intact. The riveted panel is there to be got wrong.
Do it in Unity
Use any panel from assets/examples/kenney-pixel-ui/nine-slice/ (the pack is CC0), or
download the whole pack. The field names below
are from the Unity 6 manual and the uGUI package manual, linked at each step.
- Import the PNG. Drag it into the Project window, select it, and in the Inspector set Texture Type to Sprite (2D and UI), Sprite Mode to Single, and Mesh Type to Full Rect. The manual is explicit: with Tight, "9-slicing might not work correctly".
- Keep it crisp. Set Filter Mode to Point (no filter) and, in the platform panel at the bottom of the same Inspector, Compression to None. Click Apply. Bilinear filtering and block compression are the two reasons pixel-art UI comes out blurry.
- Set the borders. Click Sprite Editor. Following the manual's steps, type the measured values into L, R, T, B (for the grey panel: 3, 3, 3, 5) or drag the green lines inward, then click Apply in the Sprite Editor's toolbar.
- Make a Canvas. GameObject → UI → Image. Unity creates a Canvas and an EventSystem for you if the scene has none; every UI element must live under a Canvas.
- Point the Image at the sprite. On the new Image, set Source Image to your panel and Image Type to Sliced. Click Set Native Size once to see it at 48×48.
- Resize it. Press T for the Rect Tool and drag the panel's edges in the Scene view. The Rect Transform changes width and height, not scale, which is why the manual says resizing "will not affect font sizes, border on sliced images, and so on". The corners should stay exactly 3×3 pixels at any size.
- Prove it. Switch Image Type back to Simple for a second and watch the corners squash, then back to Sliced.
If the corners still distort after step 6, the sprite has no border (the Image
component’s hasBorder is false) because Apply was skipped in the Sprite Editor, or the
Mesh Type is still Tight.
The trap: decoration inside the band
Kenney’s “ancient” panels have a bevel two pixels deep and a row of rivets one pixel inside it. Measured strictly, their stretch-safe band is only 14×1 pixels, because the rivets break the run of identical rows and columns. Slice one by its visible frame and every rivet in the stretched bands becomes a dash.
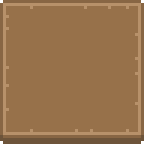 As drawn48×48
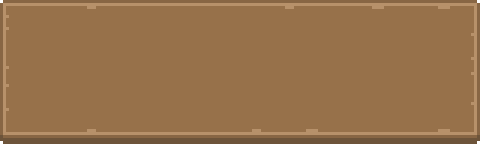 Sliced, borders 3 3 3 5rivets become dashes
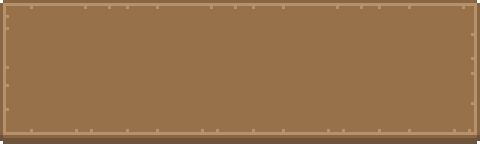 Tiled, borders 3 3 3 5rivets repeat
So the decision is: flat edges, use Sliced; patterned edges, use Tiled with every border pushed one past the pattern, on each side separately. Either way, measure.
Read next
The primary source for this lesson is the pair of Unity 6 manual pages on 9-slicing and setting up a 9-sliced sprite. They are short, current for 6000.x, and the second one is the exact click path used above. The compressed version of this whole lesson is the nine-slice cheat sheet; the words are in the glossary.
Check yourself
Ask
Anything unclear, from “where is the platform panel” to “my corners are still wrong”, is a question for your teacher. Send a screenshot of the resized panel in the Scene view; what it looks like decides what the next lesson covers.
Next
The panel now survives any size. It does not yet survive any screen: drag the Game view to a different aspect ratio and it drifts. Lesson 2 pins it to a corner with anchors, using the Rect Transform you already met in step 6.